
Have you ever used an EC2 instance as a bastion host? If so, you must have opened port 22 on your Security Group. This is necessary so that you can connect to the bastion host using ssh. A Security engineer will cringe at this. Especially if the port is opened to the world. It only takes a few seconds for an open port to be discovered by bad actors and you will notice Brute Force attempts to your instance almost right away.
“We could just open it for specific IP addresses, right?”, you might ask. Sure you can. If you are a small team this is not an issue. For a large team with many users, and especially now with remote working being the norm, you might have to open the port for many IP addresses. Add the fact that there are limits to how many rules you can have per security group, then you will end up having to deal with multiple security groups. It eventually becomes annoying to manage.
In the past, we solved this by deploying an automation solution to manage the rule creation/deletion across multiple security groups. You can also integrate it into Slack for chatOps or as I like to call it – SlackOps.
AWS, like they always do, listened and responded with a more simplified solution to this problem – SSH over Session Manager. I have always used Session Manager from the AWS console whenever I want to connect to an EC2 instance and do quick maintenance tasks. Now you can connect using SSH direct to the instance from your local machine. All without opening port 22 at all from your security group.
Setting it up
Here are the quick steps to enable this feature.
- Ensure SSH is running on the EC2 instance and SSM agent version 2.3.672.0 or later is installed.
If you are already able to connect to the instance using Session Manager via the AWS console, you can skip this step. - Ensure you used key pair for your EC2 instance. Keep the private key for use later when connecting to the instance.
- Ensure Session Manager plugin version 1.1.23.0 or later is installed on your local machine. You will need to have AWS CLI as a pre-requisite.
- Update the SSH configuration file on your local machine to enable running a proxy command that starts a Session Manager session and transfer all data through the connection. This file is located at
~/.ssh/configfor Linux andC:\Users\username\.ssh\configfor Windows.
- Make sure your user or role has the ssm:StartSession permission. You can attach the following policy into your user or role.
That’s it! Now you are ready to connect to your instance.
Connecting to your instance
To connect from your Linux machine to the EC2 instance, use the following command
To connect from your Windows machine to the EC2 instance, you can use WinSCP.
Bonus: Using AWS SSO
If your Organization is using SSO, you can create a permission set just for remote connection using SSH over Session Manager. To do this follow these steps.
- Login to your master account and open SSO
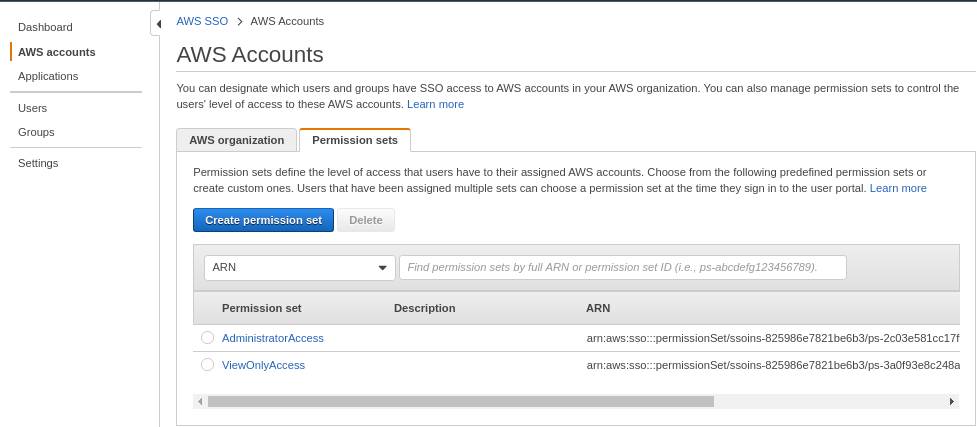
- Select AWS Accounts and select the Permission sets tab. Click the Create permission set button
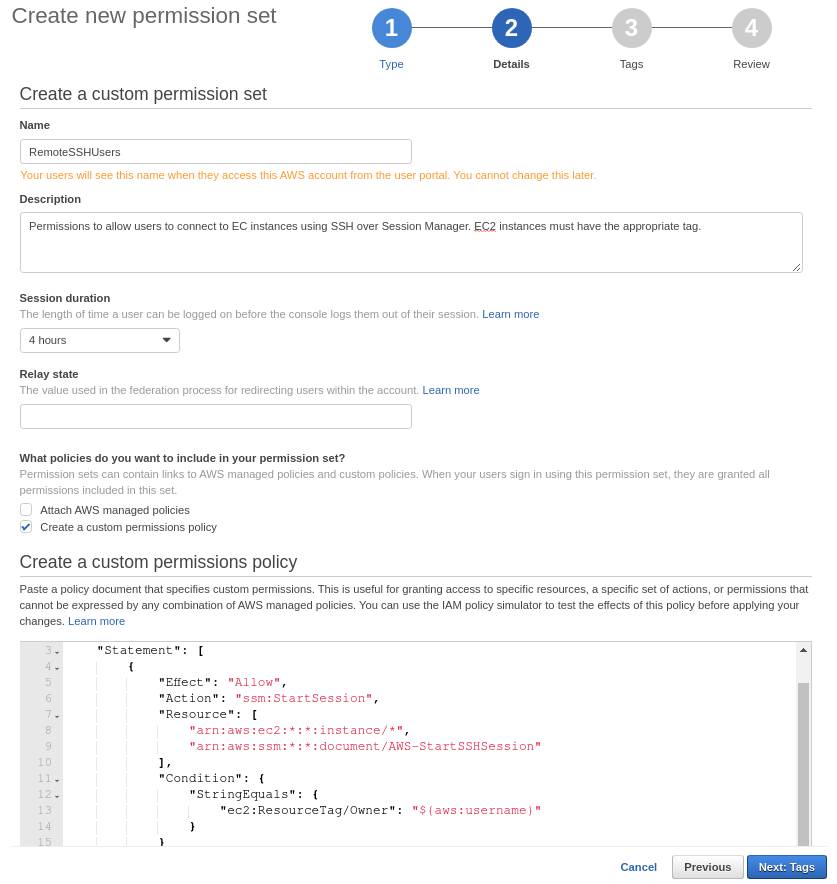
- Fill up the form as shown in the following images. You can change the name and session duration. Ignore relay state for now.
For the permissions, copy and paste the content of this policy document. This policy allows a user to start an SSM session on any instance that has the tag RemoteSSH:true - Create Tags, Review and Save

- Go to Groups and click the Create group button
- Name the group and add users. Refer to the following images for filling up the form
- Go to AWS Accounts. Select the accounts you want to add the permission set to by ticking the box
- Click the Assign users button
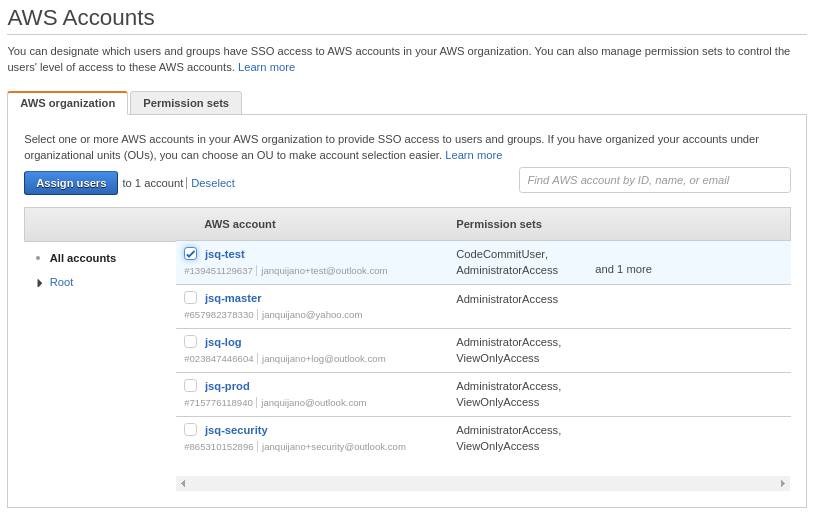
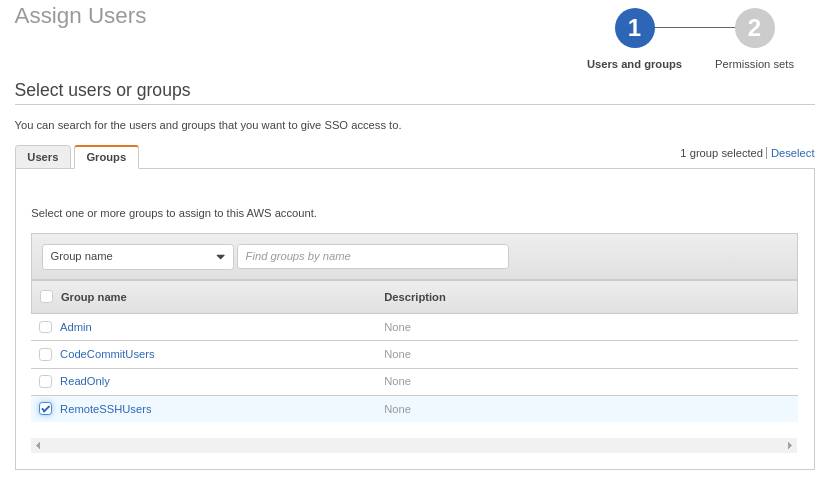
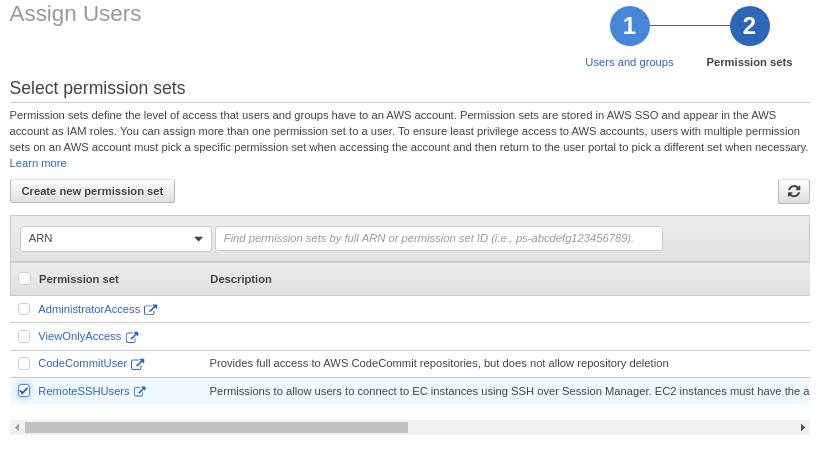
Now you can simply add the users that you permit to connect to your instances. You also need to tag your instances according to the policy document from the previous step. Using SSO, we add an extra layer of security to the whole process.
Connecting to your instance using SSO
Login to AWS SSO Console and select the account. Select “Command line programmatic access“
Copy the credentials and paste them into your terminal
- Connect from your Linux machine to the EC2 instance by using the following command
Conclusion
Securing your Cloud environments is an ever evolving process. You’re always on your toes trying to keep up with new threats. As more advanced attacks emerge, we also evolve our protection solutions. But sometimes the most basic misconfiguration can cause the most damage to your business. It is critical then that we plug all the little security holes and get the foundations right. Securing how we connect to our hosts is one of the foundations to having a secure Cloud Infrastructure.
Go ahead and try it. Make sure you close the holes in your network so you can sleep soundly at night.
